29 July 2012

Sewing Drawers

These drawers are from Kaisercraft (of course) and are a good size so can be made to suit anyone or any room.
They would be great for a student desk or for a baby's room or in this case for my Mum's sewing room!
The papers are from the Cosmo Cricket Material Girl Range and I have had them for a few years now, waiting to be made into something for mum.
I assembled the drawers by gluing all the pieces together before painting them navy blue and spraying them with a gloss finish.
I have found its just as easy to put them together and then paint, as it is to paint then assemble. It means you don't end up painting parts that will end up being covered with paper.
The actual drawers are made form a heavy chipboard so they got covered inside and out with paper (using Mod Podge). I inked around the exposed edges on the top of each drawer to finish them off.
These drawers may look like lots of work, but once you have all the papers cut and are ready to glue they are pretty quick to put together!
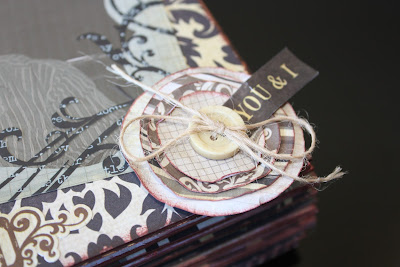
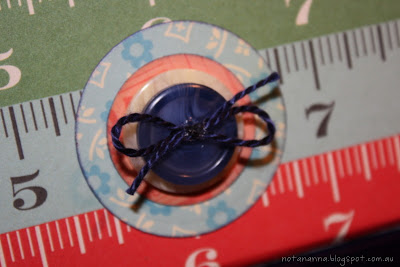
Once the papers are all on then it's time to add embellishments. In this case chipboard cutouts and stickers from the Material Girl range along with buttons and thread.




14 June 2012

Tea Please!

I came across these fill your own tea bags and thought they were a great idea.
They are VERY simple to make, I bought loose leaf tea from a specialty tea shop and filled each bag with a heaped teaspoon of leaves. A strong cuppa is a good cuppa!
The bags were drawstring so it was just a matter of closing them off and attaching a tag!
(Punched, stamped and trimmed to size)
The little box was one from my stash so I decorated it and stamped the label. 
I typed and printed brewing instructions on the back and filled it with the tea bags. 
All ready to be given away! 


I used a round scalloped edged punch for the tags.
I cut each circle in half and then folded them in half again to make the tag,
trimming off the excess and gluing them together.


I used a selection of papers from My Minds Eye and Martha Stewart Stamps. 

21 May 2012

Wedding Book

This is a fun project to make for an engagement or wedding present as it doesn't actually need photos.
Quite a few weeks prior to the wedding, I emailed the bride and groom 12 questions to answer and told them not to compare answers, that way its a nice surprise for them both when they see what the other one has written. It's even better when they come up with the same answer!
You can make this book as big or as small as you like, mine has 12 questions but you could add more or less depending on how much time you have, or how inventive you are with the questions!
I also had photos to add so did a question a page, but you can easily do the questions and answers back to back, especially if you have more questions.
I used chipboard pages cut 12 x 6 inches (makes it easy and no waste) and covered them in the fantastic Simple Stories Documented range of papers and embellishments.
A lot of wedding papers are in black and white and I wanted to use something in chocolate brown and cream, as it was a colour scheme that suited this couple better. So when I looked at the Documented range I knew it was just right for the book and the sentiments on the element pages were perfect too!
Don't you just love it when that happens!


When I saw the element card that said 'He Said ..... She Said ..."
I knew these were the perfect papers to use.

I'm a bit addicted to these 'flowers'
they are very simple to make and I think look quite effective.


I used a row of chocolate brown ribbon and then a thinner rusty orange over the top
to draw the line between question and answers.
The letters are AC thickers and I used my Big Shot and Spellbinder dies to
cut the circles and little plates for the letters to sit on.
These are attached with foam dots.


The elements from the Documented range could not have been more perfect!


I especially loved these people stickers.
I used foam dots behind the heart to make it pop out of the page.


I inked around everything.


Buttons sewn onto distressed rounds of paper make for a simple page embellishment.


11 March 2012

Mini Drawers

These little drawers are so much fun to make and I think can be made to suit anyone of any age. 
They are of course from Kaisercaft and covered in Crate Paper's Neighbourhood range of papers and embellishments.
These ones are for my niece who isn't overly girly so I went for a colour scheme of Navy and Pink which I think looks great.  The papers were perfect for her with little snails, butterflies, bees, birds and cats, all the things Jessie loves! The only thing missing is lizards (sorry Jess)!
Its a good feeling when you find papers that are just perfect for someone isn't it!


This time round I assembled the drawers then painted them, which was a lot easier than painting then assembling. 
After painting I gave them a couple of coats of spray vanish to make them nice and shiny.


I LOVE chipboard embellishments!!
These little bees and trees were just perfect for the sides.


As were the birds, butterfly and flower.


I always cover the inside of the drawers.
Yes its more work BUT it makes for a much neater finish.
I ink around the tops to cover any grey chipboard.


Paper flowers and brads make for cute little 'handles' on the drawers.


24 January 2012

Mini Fiji Album

This is a cute way of putting a few small photos into a album that fits ...well ... pretty much anywhere!
Its made using a matchbox!

This is a large matchbox (about 6 x 4 cm) but you can do the same thing with a normal little matchbox, just be careful with how many embellishments you put on the 'pages'.  They all concertina out of the box so you have to keep it simple and keep it flat when it comes to embellishing! Rub ons are ideal.
This one has 11 pages but you can add more or less depending on how many photos you want to add. 

The papers and embellishments used for this album are Kaisercraft Seaside (I love the muted colours in this range). The shell charms that hang from the front act as a tab to pull the album open, they have been in my stash for years .... just waiting for the right project!!


The cat makes a lovely back ground for this photo!

The 'disc' on this page is a Fijian 5 cent coin.  The perfect size to fill a gap.


A little flat fish button worked perfectly as an embellishment.


Yes I made the little pair of Jandals (if you are from NZ) or Flip Flops to go on my favourite picture.

The edges of the pages are inked.
The photos and any papers that I added were distressed.


Completed mini album. 
Bula Vinaka!!